Pages

Pages

Sunday, August 30, 2015

Finally a progress


If you are curious about the quilting stage of my two experiments, here are some pics just for you.


Since I had white thread in I started with the Christmas one. I added a bit of FMQ. I was going for little bubbles but truly I couldn't see where I was going. So there is some quilting in there :)


It is really hard to photograph. Just imagine my usual anyhow style.


There are only straight lines on the back.


The tiny size looks so cute.


And finally I have changed the thread to grey. I took deep breath a added the quilting to my first experiment as well.


Not so visible is it?


Here is the back side to show up the quilting a bit more.


How long does it take to bind those two? Who knows :)
Linking up with:

Quilting is more fun than Housework

Monday, August 24, 2015

Q3 - Selvage bag + Selvage along


I have this project on my Q3 FAL list and it's been there for a while. You can see I was definitely undecided back then which spelling to use and I messed up both and called it Selvadge, lol.

When Renee asked me if I want to participate in their Selvage along I said YES! Welcome to my stop of Selvage along hosted by Renee and Jessica.

QuiltsofaFeather.com


I'm not sharing any tutorials but I hope you'll find some inspiration. My bag is based on tutorial by Ayumi called Lunch bag. I just up sized it a bit.


I sewed all my selvages on piece of interfacing but it wasn't big enough so I cut it in half and added solid bottom.


If you are curious about the size. My exterior piece was 64x38cm. The bottom strip was 15cm wide. I cut the lining as one piece as well. I just place the exterior piece on lining fabric and cut all around. There is no seam at the bottom which is my preferred way of making bags.


The reason why it took me so long to finish this bag was that I couldn't decide on which fabric to use. I settled on darker orange linen and quilted with variegated thread.


The cover is simple Ikea B&W fabric. Once you fold it down it is like bucket or tote bag.


Maybe you have noticed I made the rim taller (10cm) as well. I just wanted the bag to be an adult size.


I wanted to make one for myself ever since I made that first one on left. That is the original size.

Since we are talking selvages here are few more projects I previously made. The first one is variation on pouch called Sleeping bag. It uses endless zipper.


This is one exterior piece open wide pouch. Read more here.


Selvages are perfect for the final touch on your pincushions as well. No matter if it is giant or skinny. Details here.


Here is the full schedule of the blog hop:

July 20 - Intro post
July 24 - Selvage storage/collection linkup 
July 27 - Selvage Strip Pillow Tutorial by Jess @ Quilty Habit 

August 3 - Anna Maria Horner Selvage Feathers Tutorial by Renee @ Quilts of a Feather
August 10 -  Selvage Zippy Pouch Tutorial by Chris @ Made by ChrissieD & mid-way check-in linky on both blogs  

August 17 - Selvage Binding Tutorial by YvonneQuilting Jetgirl

August 24 - Project by Vera @ Negligent Style 
 <<<You are here!
August 31 - Project by Jess @ Elven Garden Quilts
Sept. 7 - Selvage Churn Dash Project Share by Helga @ Cluckin' Pineapple 
Sept. 14 - Tutorial round up on both blogs
July 24 - Linky - selvage projects on both blogs
Sept. 21 - Last linky party- link up all your selvage projects!

Linking up with Finish it up Friday!
2015 FAL at On the Windy Side

Friday, August 21, 2015

Selvage along - small project


I already finished the easiest and quickest selvage project. Pencil holder and you guessed it. There are more to come :)


I keep my pins in there so this time I have a lid to put on.


I only forgot to match my seams. Nobody is perfect, right.


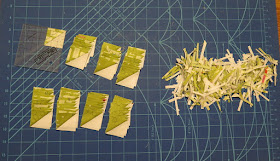
Do you remember the pile of mess from trimming? Well, I cut it up even more.


I placed organza on top of it and added some zig zag lines. No ironing this time around.


I also stitched together my tiny HSTs. I admit I make projects based on the thread I have in my machine.


They finished 1" and believe it or not I didn't sweat to get such perfect points. I used my 1/4" foot with guide as usual and that's all.


I ironed the squares on interfacing first and used the postage stamp block technique.


Here is how my experiment continued. I cut out three triangles and sewed around them.


I'll add more quilting in but I ran out of white thread in my bobbin and I also have another things to work on. Time to change the thread! :)

Linking up with finish up Friday! and


Quilting is more fun than Housework

Monday, August 17, 2015

Scraps rules


I felt like trimming. My off cuts from flying geese became 1.5" squares.


I need 40 pcs for mug rug and I ended up with 70 pcs which gives me options to play.


Plus there is this pile. Trash it or experiment? I feel like experimenting. It must be the rain we finally got. The temperature dropped so my brain is fully functional again, lol.


Remember the bag of scraps I got from a friend? Well I opened it up and it was an overwhelming experience.


My machine was covered by those scraps and I got lost while sorting. I have way too many ideas and I probably won't use every single bit. There are number of florals and multi colored pieces which are definitely out of my comfort zone. So we'll see what happens next. It's not their time yet.


Linking up with Scraptastic Tuesday and

Quilting is more fun than Housework

Sunday, August 16, 2015

Selvage along - how is it going?


Not too well as the whole Europe suffers from massive heat wave. Our outdoor blinds are down and it feels like living in the cellar. Unfortunately not the wine-cellar which would probably be much cooler. Most of the days my brain is partially cooked so there is no space for sewing in it :)

Anyway I finally settled on fabrics which I'm going to use for my selvage bag. Progress made!


Plus quick side track project. Almost done :)
And my experiment needs B side so why not use some more selvages. Yeah!


See all the inspiration others have shared already> Selvage Along mid way check in.

QuiltsofaFeather.com

Wednesday, August 5, 2015

WiP experiment continues


So what was the next stage of my experiment? I created paper template.


It ended up little smaller than my original intention but I was thrilled with the result.


I knew I will need  some sheer fabric to hold those tiny pieces in place. I used polyester organza which I have left from other projects.


I wanted to add zig zag stitch to create some sort of grid but since the letters are small I don't think it is necessary.


I transferred the template onto fabric and cut it out. I added light weight interfacing so hopefully raw edges will not fray that much. 


All finished and ready for quilting. I'm a bit afraid the quilting will ruin it but we'll see ;) I want to run small stitches around the letters but I'm also thinking about matchstick quilting. Decisions decisions.


Linking up with:

WIP Wednesday at Freshly Pieced