Wednesday, January 31, 2018

OMG - 01 finished


On the very last day I have completed my OMG goal.


My goal was to try out this tut called Prairie Point Pouch Tutorial. I have adjusted the size to zippers I had on hand. I have also tried larger points on one of those pouches. I found scrap of that fabric and wanted to use it all.


See the back side. You don't need large piece of accent fabric that's why I still have some left even though I  made my accent stripes wider.


I haven't tried this type of zipper assembly before.


Looks good on the end. No bulk.


I must practise some more on the front side. I have a small gap on two of those but still looking fine.


I have put those pouches on my FAL Q1 list as well, so that's 2/6 completed.
Linking up with Finish it up Friday and more:

  Elm Street Quilts


Saturday, January 27, 2018

Tutorial: paper tin cover


For making paper tin cover you will obviously need some paper tins. My tins come mostly from alternative coffee products, granulated tea for kids or müsli.


For creating post stamp blocks I have used this tutorial. It's easy technique which I previously used on few projects.


To determine the size of your block measure your tin and add a little bit to each side. I mostly add approximately 0.5" but in this case it depends on the size of your squares used to make the block.


Since there is already interfacing in these blocks I do not add any batting. If you will use batting make it the size of your tin without the folding addition.


Here you can see the top with exceeded fabric folded over and top stitched. The bottom looks the same. Once you have your block top stitched at the top and bottom you wrap it around your tin and pin to determine where to sew together.


And that's it. Turn it around and slide on your tin.


It's fairly easy. I did not use exact measurements in this tutorial since all tins are different. I hope you find it useful and try it yourself.


If you would like to hang your tin on rod just like I do add piece of ribbon and button for that purpose. The ribbon is added prior sewing the whole piece together.


You can also use any other type of block or just plain fabric. Just add piece of batting or make it as QAYG. Dress it up to suit your needs. Here are some examples.


I do get asked what do I put inside. Well here is peak. Not all my tins are fully loaded since I finished them just yesterday :)


Friday, January 26, 2018

Q1 - paper tin covers


I have finished all eight paper tin covers. Yay! My first finish out of my FAL list.


Why did I choose such fabric combination? To match my board :)


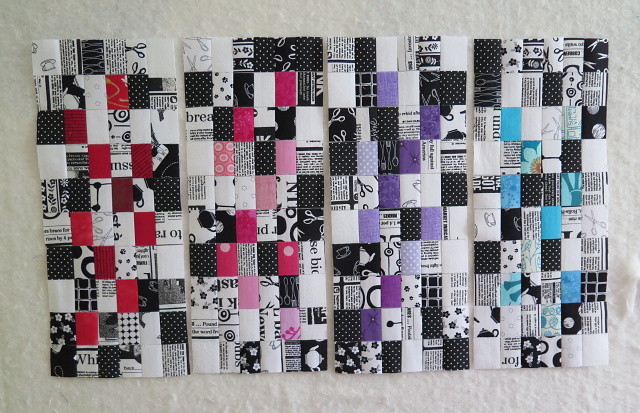
As for the board, I have used post stamp blocks. See the tutorial here. It's great technique and you get such pretty points.


I always like the middle stage when the squares become rectangles.


The not so fun part is ironing those seams open.


The result is well worth it. Those tins fits perfectly on my rod.


Sorry no daylight available :) Are you curious how I hang them?


Piece of ribbon and button do the trick. These covers are pretty easy to make. I took few pictures during the process so I'm wondering if anyone would be interested in tutorial?

***added tutorial here


Current stage of my sewing space. Almost there :)
Linking up with Finish it up Friday and more:


Thursday, January 18, 2018

TGIFF creatures


Welcome to TGIFF!

Hosting TGIFF has motivated me and I have a finish to share. My girl is calling it "friend". She was sick and stayed home. To be honest with you it was a hard cooperation :) I don't know how others do it but I prefer to work on my own.


I showed her some pics on Pinterest for inspiration. I really liked those with one eye but she did not. I visited few pages and probably found the source. They are called Hohos and you can check them out for yourself here. Anyway I made this one to suits her requests and to use up my stash and scraps.


And she was happy with it. She already slept with her new friend. The trouble is, I have two girls. When you make something for one you can be sure the other one will want it as well.


She draw a little sketch and I tried. I used old tights for both of these creatures.


It is not the Hoho I wanted to create either so I had to make one more...


Just a little one but finally the type I wanted :) Great project for scraps or old clothes. Get inspired by this tut and make one too.

Here is our trio!

Now it's time for you to link up your latest finishes! Don't forget to tour the other finishes and spread the comment love! Please include a link and/or button for TGIFF! If you would like to host the linky party yourself check out the TGIFF web, there are still some dates available!


Tuesday, January 16, 2018

WiP


In order to motivate myself to finish things and to blog more this year I decided to sign up for hosting TGIFF.


This Friday January 19th is my turn!
Will I finish few paper tins covers?


I have partially sewed up green, yellow and orange squares.


Or will I finish this creature? We'll see.
If you have a finish please come back and link up with TGIFF once the link is open.
Have a great week everyone!

Linking up with:
Sew Fresh Quilts

Wednesday, January 10, 2018

2018 FAL Q1 list


Time to make the list for Q1. Here is mine:


Some projects are new. Some are pretty old.


I started paper tin covers. I made one as trial and pretty much love it.


Prairie point pouches are my current OMG goal.


I precut some fabrics and vinyl in December. Time to finish those vinyl pouches.


Pig cushion to be finished.


Echino bag in progress.


And ongoing project love wall hanging.
Linking up with:
Marci Girl Designs