Monday, June 30, 2014

Catching up - June round up


Last month I participated in Ho, Ho, Ho And on We Sew hop. I almost forgot this time around but today I made up quick mug rug. I used Hex N More mini ruler to cut those hexagons and triangles. Mug rugs are great to test out patterns or techniques. There is simple pocket made out of interfacing on the back side. Just right for postcard or Christmas card.


I can't believe how fast June went. I also forgot to link up with ALYoF. My goal for June was Mini Disco quilt top. I finished on June 13th already and you can read all about it in my Tribute post. I gave it away to my friend and she'll be doing some FMQ magic on it. She is pro and I love her work.


June was full of exciting stuff. I received such a great feedback on my intro post for New Quilt Blogger blog hop. I give you one more of those silly pics of mine. Being part of My favorite quilt series on Sew Mama Sew was so flattering too. 


Me and my husband celebrated 10 years anniversary. I received fab gift and I'm working on Love quilt just to keep in mind I found the love of my life.


I got excited over squares and I have plans to chop every single scrap into square now. Think big! Pixelated quilts here I come, lol. 


And I put together another simple tutorial - lavender sachet. Farewell June!


I'll be linking up with Fresh Sewing Day and Let's Bee Social!

Lily's Quilts
Sew Fresh Quilts

Saturday, June 28, 2014

Tutorial: Lavender sachet


What will you need: non fusible interfacing, piece of felt, pinking shears, eyelets and dried lavender.


I used local non fusible interfacing (100g). Make sure there is no glue on any side! The reason to use interfacing is, it doesn't fray and it holds shape properly. It doesn't have woven texture like fabric so it will hold dried content securely.

Cut out rectangle measuring 34x20cm. Fold and sew where the red line is. Leave 1/4 inch at the begging and end as the edges will be trimmed with pinking shears. Turn inside out and move over to ironing board.


I prefer to put the seam to the side but you can have it in the middle like real tea bag. Your choice. Press. The side with the seam should facing up. Fold in half and press.

We need to have the seam inside and create crease on each side to form the bottom part of teabag. Just fold about half inch on each side while having the center crease in the middle. Check below picture or any tea bag for reference. Finally I folded top edges about an inch and pressed to create crease which define final tea bag size.


Back to the sewing machine. Sew a line where we created the bottom creases to prevent anything falling into that section. I marked red line as the stitches are not clearly visible.


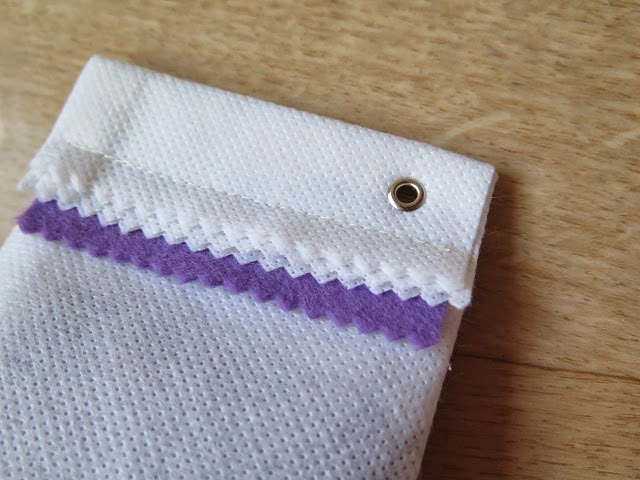
Time to use those fancy pinking shears. Cut the edges. Prepare piece of felt to add a bit of color. Fill with dried lavender. The top crease will help you to determine how much to fill.


Once filled, fold the top edges over, add stripe of felt and sew over. Finish with eyelet.


You just created simple and quick gift. Ask your kids to make tags to add personal touch and these are good to go.


Friday, June 27, 2014

Lavender sachet


You would think I worked on squares pouches. Nope. I created something else. Something quick and easy.


How come? Well, I ordered some interfacing and one particular kind was not what I expected. Something started to roll in my head (as usual). What should I do with it? Few years ago, ehmm yes, I wanted to make tea bags for our tea set. Why not make giant tea bags filled with lavender. That would make quick gift for those school ladies.


I asked my girl to make some tags. She wrote: Enjoy the summer on one side and draw a picture on the other. That added personal touch and they were good to go.


They were super easy to make and I took some pictures along the way. Should I make a tut for those?

**update: you can find the tutorial HERE

Linking up with TGIFF and Crazy mom quilts.

Wednesday, June 25, 2014

WiP - squares


I usually say, I'm not a square person. I'm not attracted to squares. Especially large squares. I know it's like the classic of all classics but they seems a bit boring to me. I prefer triangles, hexagons, circles, diamonds anything but squares. Yes, medallion quilt count as square in my head, lol.

How come I'm making squares? It is all Melissa's fault! She posted her block of June Do Good Stitches with link to this tutorial and I'm lost.


I seen this technique before but never tried it. I was worried that the interfacing is going to stick to my iron once I iron those seams open. It does not. As I just wanted to try it out, I started with 3cm squares. Ehmm. The idea was front panel for pouch so that worked out but I don't think I want to repeat this experiment.


I cut the next set of squares 5cm which is pretty manageable size. Those worked as back and bottom part. I put the pouch together just like this scrappy one. The front and back were uneven pieces.


It is another version of well known Open wide zippered pouch. I used longer zipper which created the handle just like this one.. As I couldn't find any ribbon I made up simple zipper pull out of my beads supplies.


It is meant as gift for my girl's teacher. The school ends this Friday. There are two more ladies I would like to make a gift for. It is looking pretty fancy considering I used scraps. I picked the scraps based on the color of my zipper. Yeah. When I'm unsure which fabrics to use I pick the zipper first and go from there.


Number two and three are in progress as well.


Linking up with

Sew Fresh Quilts WIP Wednesday at Freshly Pieced

Sunday, June 22, 2014

Sunday stash


As promised here is my box filled with love :-) Do you wonder how my husband was able to pick such fabrics? Well, I have a friend who runs fabric store so he asked her for help. Very smart! It is not a store in our town or something. It is in Slovakia so he planned that for a while to deliver one of the best gifts ever.


You'll see those pretties in use soon or later. I was not able to get the exact colors. I admit those are just a quick shots, sorry I have some sewing to do :-) 

Linking up with Sunday Stash 
Molli Sparkles

Friday, June 20, 2014

LOVE anniversary


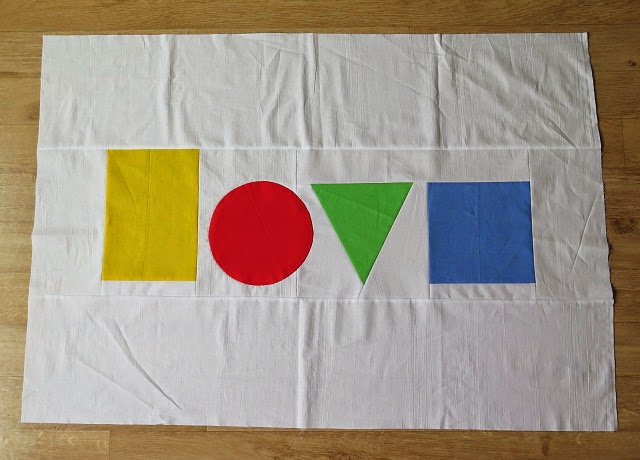
I wanted to make something for our 10th anniversary. As some of you brought up question about that circle in my header I dust off my old plans and started another Love project. I really like this design (not mine) and I have plans for quilt as well. This is about to become wall hanging. You can read about the inspiration and previous projects here.


I made full size templates to help me visualize the whole thing and make sure I have right size. I added seam allowance and cut out the shapes.


First I pieced the triangle and added square, plus fairly simple rectangles to the other side. I wanted round circle so no piecing but I used hand appliqué technique.


Here it is with the first Love project - mug rug. Current size 31x43". I just need to figure out how to quilt it. Probably it will become another practice piece for my FMQ adventure. 

The time really does fly. So far we did not celebrate our anniversary. Honestly I wouldn't remember the date if we didn't have it written inside the rings. It is not a big deal really but this time around we went out and had dinner and spent some time without our lovely girls. My husband had a surprise gift for me. Dotty box filled with some fabric love. Yay! I'll show you what's inside on Sunday Stash ;-)


Linking up with TGIFF and Crazy mom quilts.

Wednesday, June 18, 2014

WiP - Ballerinas


It is happening again. I'm working on Ballerinas. This is kind of UFO. It is the first project I shared here on this blog, ehmm more than a year ago. It was meant to be quilt for 7th Birthday but as time goes by I adjusted it into 8th. The backing is going to be pink so I wanted to incorporate more pink into front as well that is how I ended up with 8th house. I don't have any Summersville charm squares left so pink it is.


I rearranged the layout many number of times. I need to stare at it a bit longer to decide if that is the final. The original pattern is by Elizabeth Hartman called Neighborhood. I'm not really in love with this thing anymore that is why is taking me so long to finish it but I know there are some fans out there. Hello Sandra, I'm looking at you! :-)


Have you ever made any 3D pinwheels? They are quite fun and easy just a little bulky in the center. Pinwheels were the theme for Across the Pond last year. You can check some cool ideas in Amy's post or Amanda's.


To celebrate my progress I of course started something new, lol. I owe you some comment replies and 1 year Blogiversary whatever. It's coming. Hang it there! XOXO

Linking up with WiP Wednesday and Let's Bee Social!

WIP Wednesday at Freshly Pieced  Sew Fresh Quilts