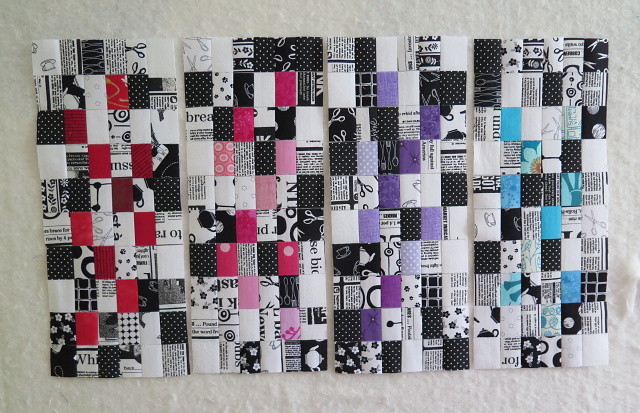
I have finished all eight paper tin covers. Yay! My first finish out of my FAL list.
Why did I choose such fabric combination? To match my board :)
As for the board, I have used post stamp blocks. See the tutorial here. It's great technique and you get such pretty points.
I always like the middle stage when the squares become rectangles.
The not so fun part is ironing those seams open.
The result is well worth it. Those tins fits perfectly on my rod.
Sorry no daylight available :) Are you curious how I hang them?
Piece of ribbon and button do the trick. These covers are pretty easy to make. I took few pictures during the process so I'm wondering if anyone would be interested in tutorial?
***added tutorial here
Current stage of my sewing space. Almost there :)
Linking up with Finish it up Friday and more:


I would love to see how you made them. They are awesome!!!
ReplyDeleteI would be interested in a tutorial. What kind of tin are they and what cab you put in them?
ReplyDeleteA tutorial would be great!
ReplyDeleteThey look perfect!
ReplyDeleteThose tins are AWESOME ! What kind of tin is inside ? I would love to try to make one or two.... :-)
ReplyDeleteHow ingenious is the ribbon and button trick!
ReplyDeleteYou have a very colour-coordinated and stylish sewing space now.
Definitely a tutorial, Please!! They look wonderful!
ReplyDeleteI think your paper tins look delightful, but I can't, for the life of me guess what they're for! Last week I thought they were waste paper baskets, but clearly they aren't. Please enlighten me, Vera.
ReplyDeleteoof, I just added my comment to the tutorial page, so I will post that here too
ReplyDeleteThis is very cute. I love making these sorts of things too. I have one I made for my car to use as a little litter bin, of course I have a "bread bag" inside as a liner and no cover. I clip it to my back seat. It looks very snazzy and everyone things you spend your whole life sewing (of course we do, or we would if we could, it is just that other stuff inbetween we have to wrestle with)
I love the bins, you could tape or embroider a tape as the contents.
Sometimes I make things like this for friends and they are so interested hahahaha too bad
Great technique, and beautiful result! i love your pretty bags!
ReplyDeleteHa guess I commented on the 'wrong' post too...these are super-cute, and thank you for a tutorial which has been safely bookmarked in my folder! Thanks for linking up with TGIFF!
ReplyDeleteThose covers are so sool. I would like a tutorial on them, please.
ReplyDeleteWOw!!! Your wall is super fantastic - the rainbow checkerboard bins really add a lot to it, don't they? What do you store in these? And thank you very much for doing a tutorial
ReplyDeletethey look fab! I love the colours. But I'm curious, what's a paper tin?
ReplyDeleteThese are fantastic!!
ReplyDelete